Welcome to lesson 5 – Actually creating a PPC campaign in Google.
For this lesson you will need a Google account
Once you are logged into your Google account there will be a list of My Products and a Try Something New section. Within the Try Something New section please click on AdWords.

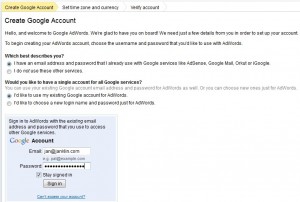
On the next screen you can start creating your AdWords account. You can use different email addresses for this but for this lesson we will use the account details that we already have. So please select the I have an email address and password that I already use with Google services like AdSense, Google Mail, Orkut or iGoogle option. Then please select the I’d like to use my existing Google account for AdWords. Then please enter your login details.
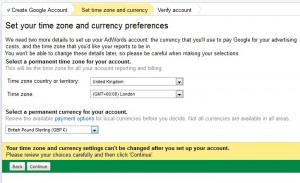
Next you will need to set up your time zone and currency. If you are in the UK Please set the Time zone Country to United Kingdom and the Time Zone to (GMT+00:00) London. Here you will also be asked to Select a permanent currency for your account. If you are in the UK we recommend that you use British Pound Sterling (GBP £).When you are happy with your choices please click the Continue Button.
Next you will be sent to a confirmation screen. Please click on Sign in to your AdWords account:

Now you have set up your Google AdWords account. You will be sent an email to let you know and you will also be sent to the Welcome to Adwords page. On this page please click on the Create your first Campaign button.

Now we can start creating a new campaign. For this lesson we will be creating a simple Search Network campaign that runs only on Google search, on desktop computers, 24/7 throughout the whole UK, has basic Ad delivery and no Ad extensions. Don’t worry if you don’t understand some of this paragraph, you will by the end of the lesson.
The first option is to Load Settings: For this example click on Campaign Type and select the Search Network Only option. This is a quick way to alter some of the overall setting on your campaign. This will stop your Ads running on other websites (websites with AdSense). Now that this is in place we can move forward.
Step 1 Campaign Name: You should give this a relevant name that you will remember in the future. For this example we will call ours Computers because it is being created to sell a wide range of computers online.
Step 2 Locations and Languages: Here there are a options to set your campaigns to run in different countries, regions and languages. For this lesson we will just set this to UK and English.

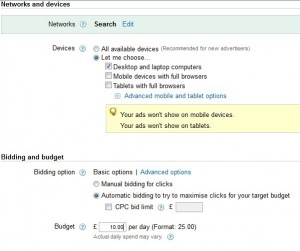
Step 3 Networks and devices: We have already set this to Search only (from the Load Settings). We will also set the devices to Desktop only by clicking on Let Me Chose and un-ticking Mobile Devices and Tablets.
Step 4 Bidding and budget: There are 2 bidding options (there are more in the advanced but for this lesson we will stick with Basic options): Manual bidding and Automatic bidding. If we choose Manual bidding this means that we will choose exactly how much we are willing to pay for clicks on our Ads. If we click on Automatic bidding Google will choose how much we pay for each click on an Ad but will not exceed the budget we set for the day. For this lesson we will let Google choose so we will select Automatic bidding. Also in this section we will set our budget for the day. For this lesson we will set this to £50 but this depends on your products and services and how much you are willing to pay per day for your advertising. You can change this whenever you want.
Note: There are more options on this page which will be covered in advanced lessons in the future but this is enough to start our basic campaign that we outlined at the start.
Next click on the Save and Continue button at the bottom of the page.
Now that we have the campaign settings in place it is now time to create an Ad and assign Keyphrases to it. You should have all of this information ready from previous lessons (Lessons 2 and 3).
Step 1 Write Your Ad: Ensuring that Text Ad is selected please fill in the Ad fields: Headline; Description Line 1; Description Line 2; Display URL; Destination URL (here you will see that Google have included the http:// for you). Once you have done this you will see that Google has Ad previews on the right hand side.
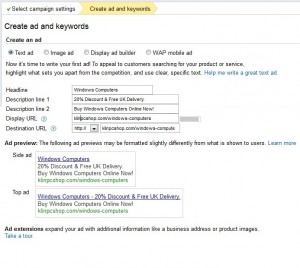
Step 2 Adding Keyphrases: Here is where you add the keyphrases you have chosen. Don’t forget to include the match type: Broad, “Phrase” and

If you are happy with your Ads and keyphrases now please click on the Save and continue to billing button.
On the following pages please simply follow the instructions and enter how you would like to pay.
Once you have done this click on Campaigns then click on the Create an AdGroup then continue with you campaign by adding more AdGroups (You will need to rename your first AdGroup at this stage because Google will automatically call it AdGroup#1).
